
Other knitters often ask how I learned to knit. There’s a lot of answers to that question– my favorite being a story about whittled sticks for knitting needles and yarn from the craft lodge at summer camp when I was a camp counselor in college! But the more nuanced answer is that every time I start a new project I make sure there’s at least one technique involved that I’ve never done before. That way, little by little, I’m always learning new knitting skills.
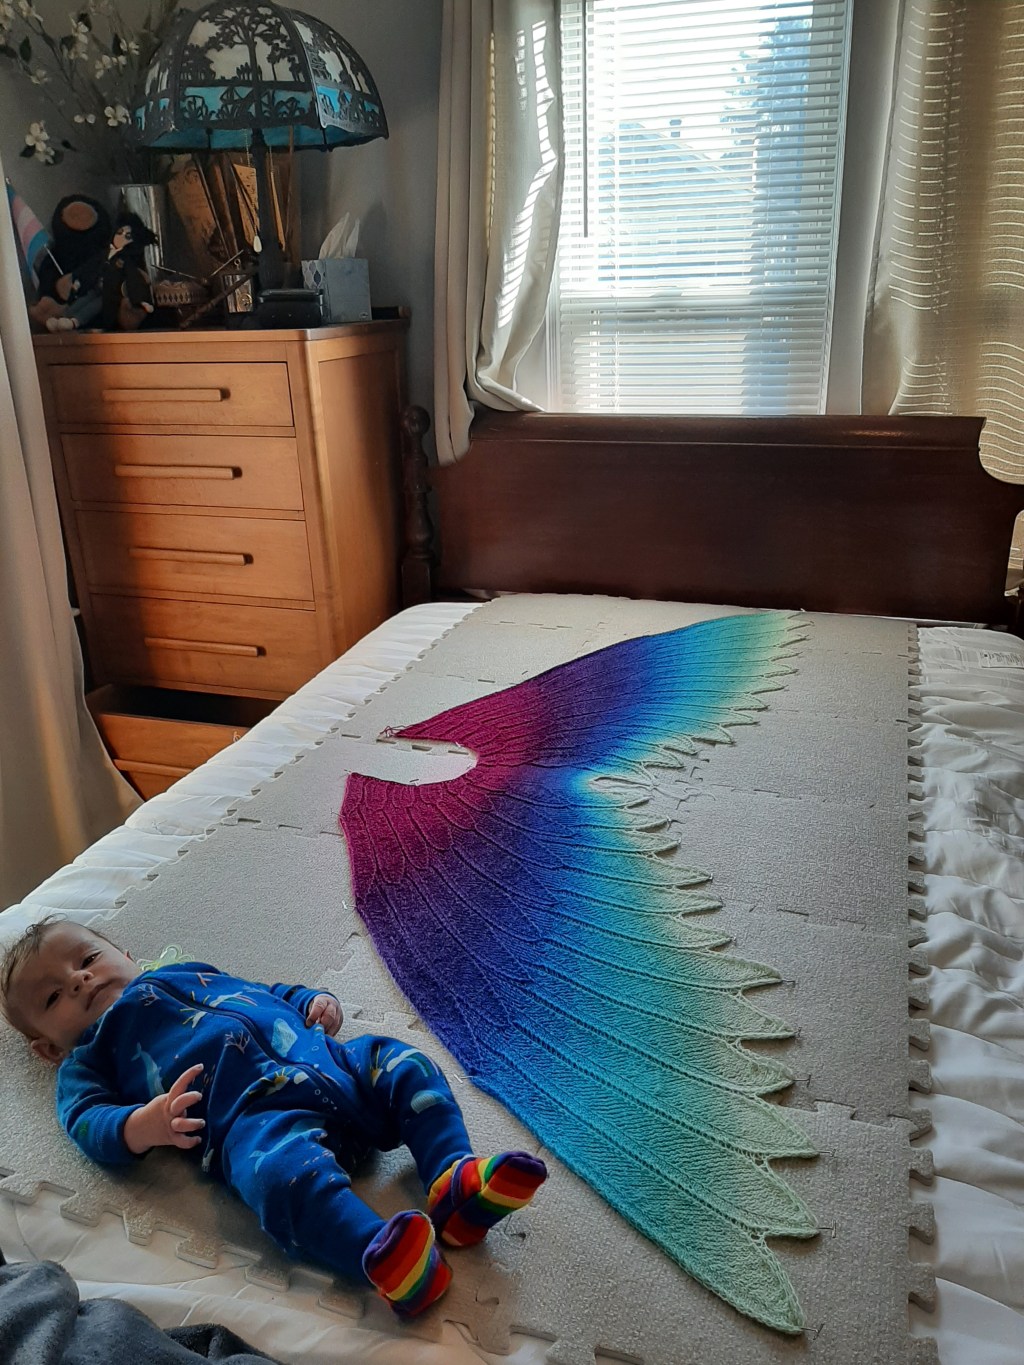
This project, my attempt at the famous wingspan pattern (which has been one of the most popular patterns on revelry for years now), is by far one of the most difficult projects I’ve ever attempted. I’ve honestly spent years working my way up to being confident enough for this project. And it has *not* gone smooth. I’ve had to frog giant chunks multiple times and Caitlin had been very patient with the extent of the cursing I’ve done at this project. Ultimately, I’ve unintentionally learned a ton of new techniques. But the major technique that I intended to teach myself at the start of this project is blocking.
Blocking, at its simplest, is just getting a thing wet, laying it out to the shape you want it to be, then letting it dry. It helps knit items, especially wool, maintain their shape better. But many patterns, especially baby blankets (which is honestly most of what I’ve knit), blocking isn’t really necessary because they’re just a rectangle and it doesn’t really matter if the shape and dimensions are perfect. My one past attempt at blocking didn’t go well. But it’s a skill I need to have to do a lot of more complicated projects, so it’s something I want to learn.

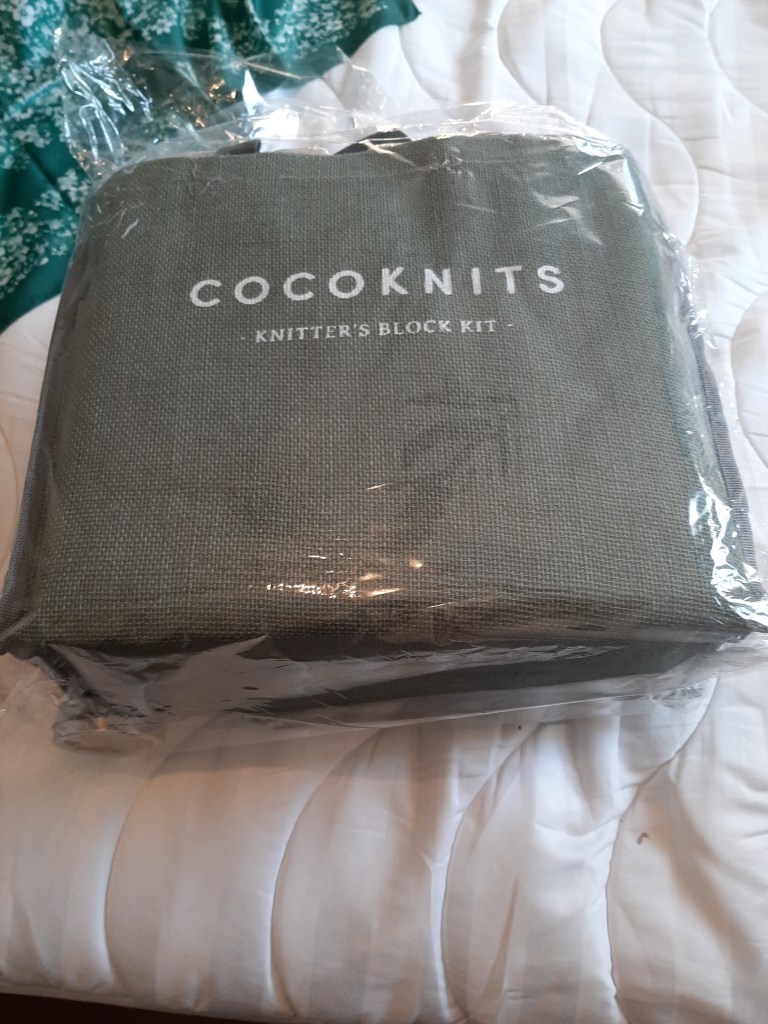
The wingspan pattern says blocking is required, and I see why. It’s a delicate lace pattern, and the feather designs of my finished knit are just wrinkled and curled enough that they’re hard to see. I haven’t done very much lacework before, and it generally requires extensive blocking. So here goes! I’m following the instructions for wet blocking from cocoknits, a designer I trust and the maker of my new fancy blocking kit.
I’m following this blocking tutorial from Cocoknits

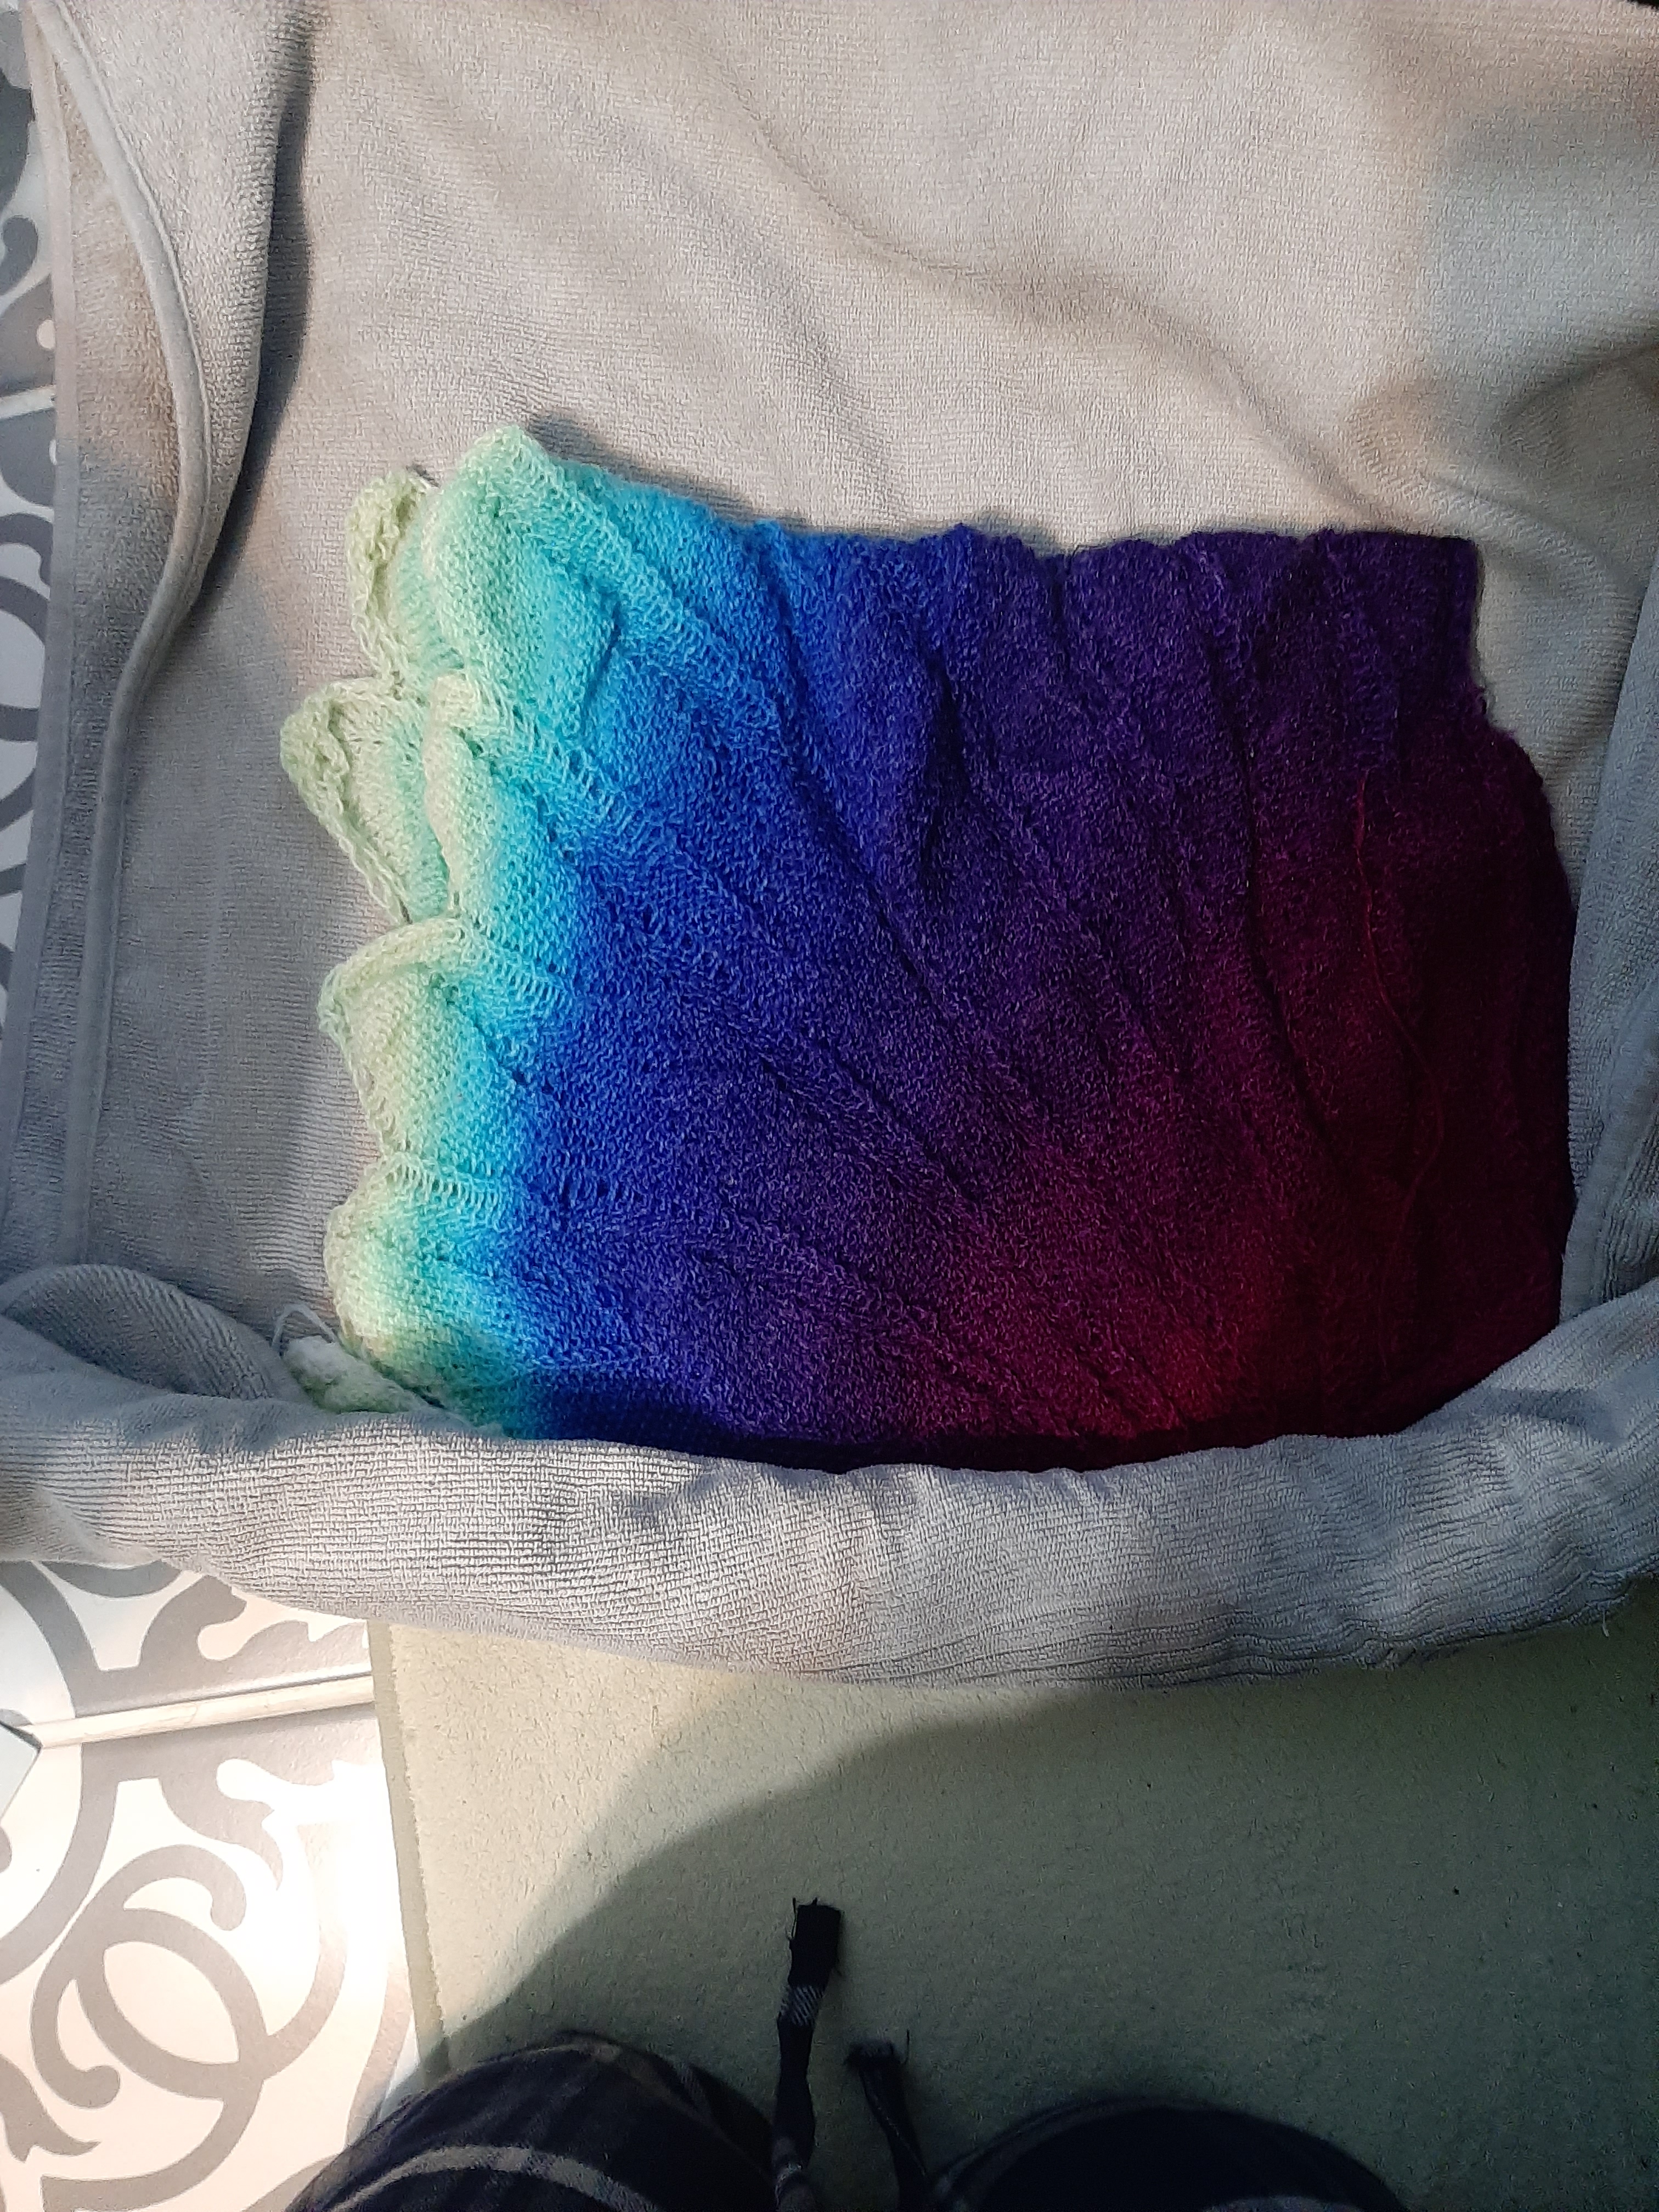
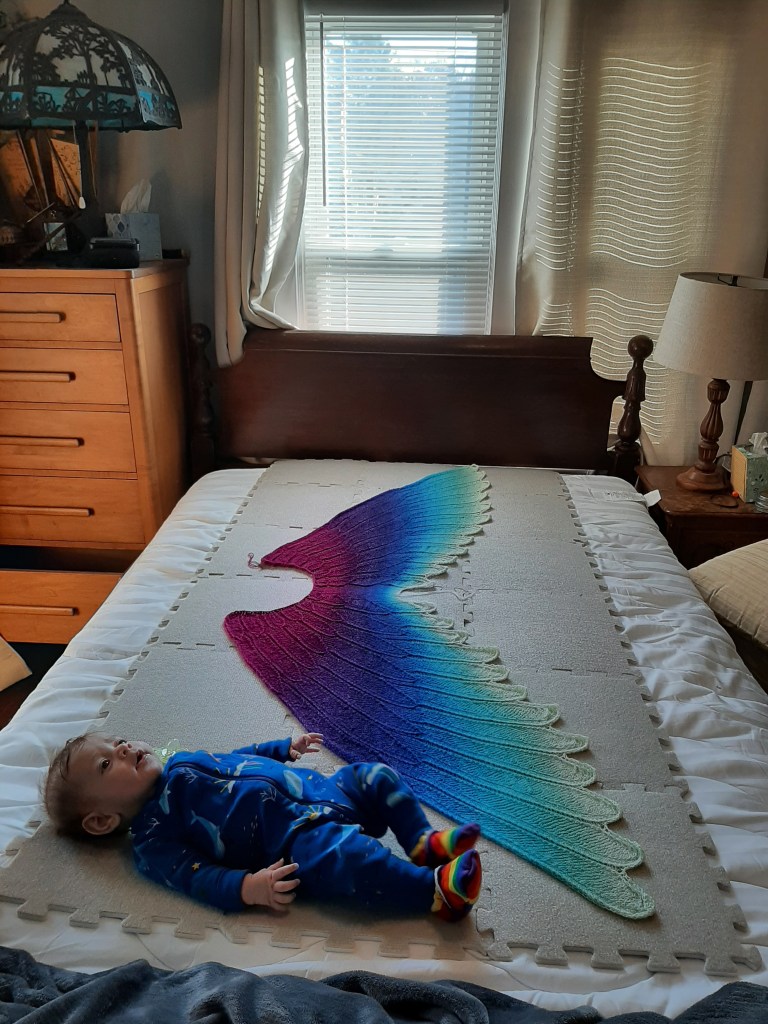


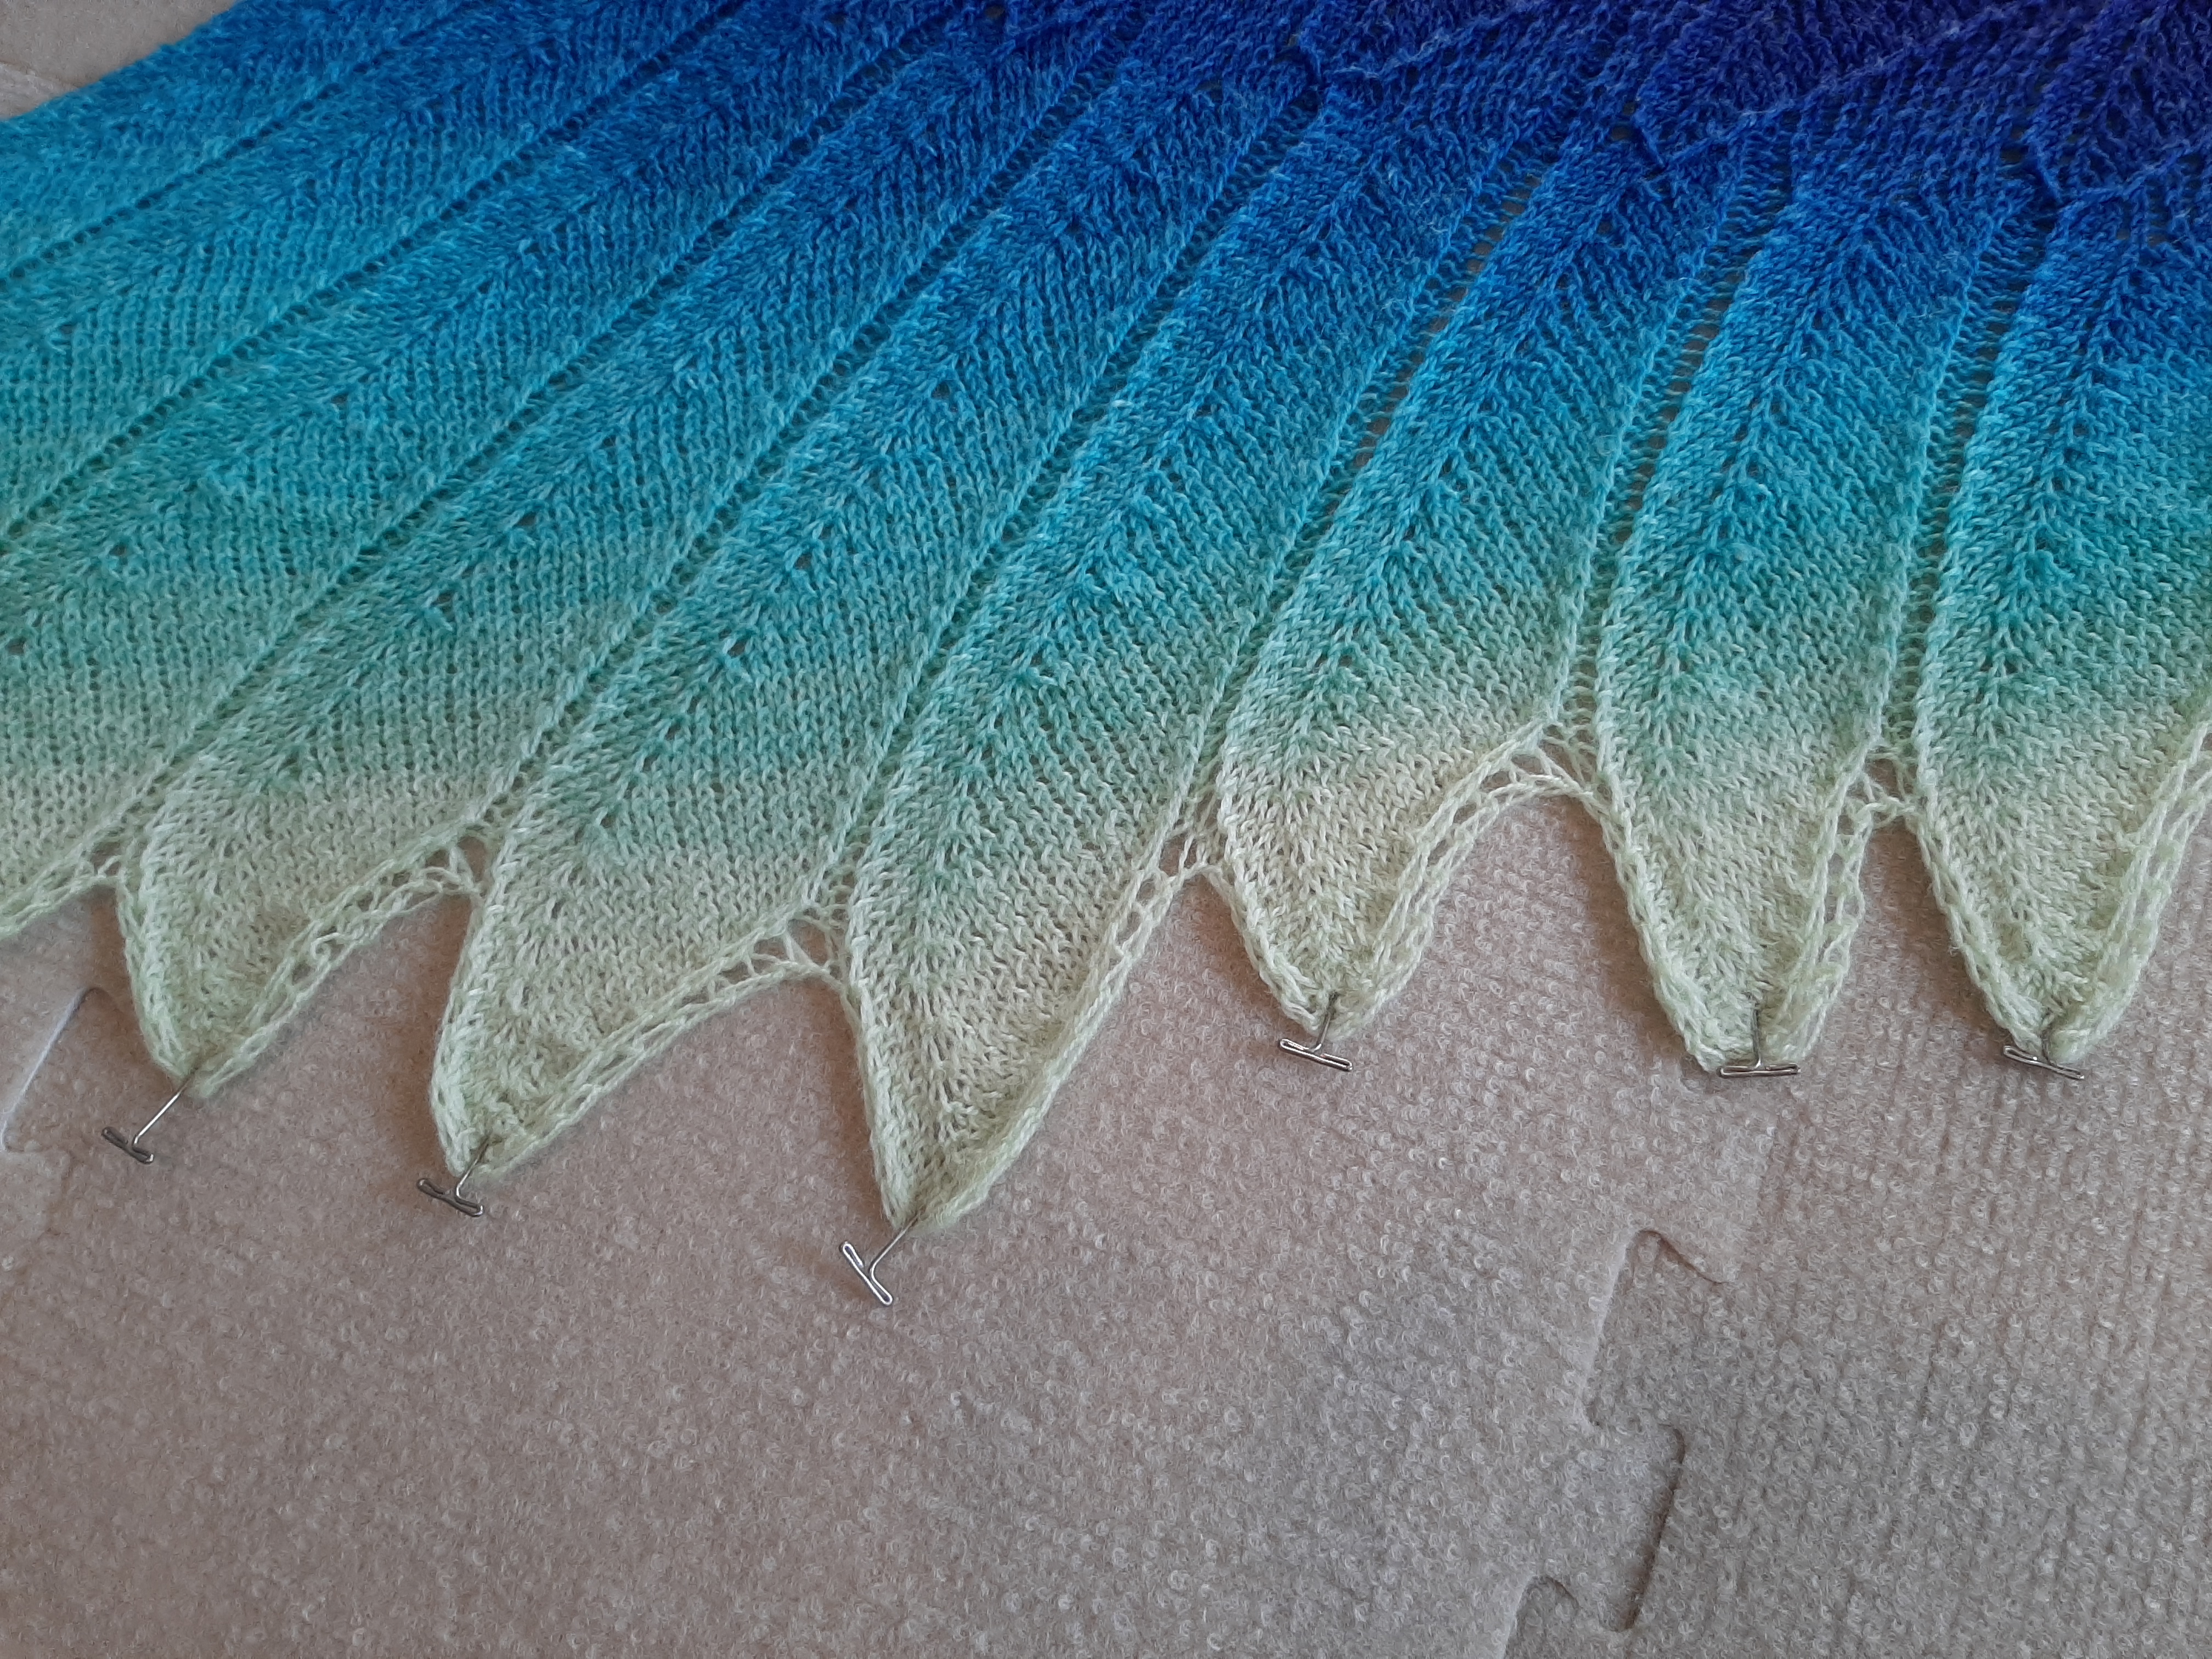
Now all that’s left is to let it dry and see how it turns out! The tips of the feathers were rolling very dramatically before blocking, so if wet blocking doesn’t solve that issue I’ll try steam blocking next. Then I’ll need to weave in my end, add some sort of clasp around the neck and maybe a finger loop at the wingtips, then this monstrosity of a project will be done!
- Lessons learned:
- I don’t think I’ll do it on the bed again if I can avoid it; a harder surface underneath the blocks would be easier.
- The pins don’t need to go in very far and it’s easy to accidentally push them all the way through the blocks
- The whole thing took about half an hour and wasn’t nearly as scary as I thought!
- Featured Project: Wingspan
- Medium: knitting
- Pattern: Wingspan by Kyle Vey
- Material: 800 yards fingering weight, 80% superwash merino, 20% silk, color “magical morning bird” from Wendy’s Wonders
- Started: November 2021, in progress as of March 2022
- Related Posts:
#knitting #workinprogress #tutorial

Leave a comment